

In this post, We will learn about How To Integrate Google Login In React Native Apps For Android. Implementing Google Login is a very good option for Applications For User Authentications.
Why Google Login?
Let us examine why google login is the best way for logging in users into your app.
- First of all, it becomes very easy for the users to login into your app because user have to press only one button for login rather than filling username/password for simple login.
- Secondly users have no need to worry about the case if they forgot their password. Because they don’t have to remember any password for this kind of login.
So that’s why Google login is the best way for letting users logging into your app.
In this Tutorial, we will be using react-native-google-signin npm package for Google Signin.
Following are the steps for Implementing Google Signin
- Google Project Configuration
- Installing react-native-google-signin npm package
- Implementing Google Signin functions in the app
So lets dive into the action.
1. Google Project Configuration
For using Google Signin , we need to get google services configuration file( google-services.json). We can get the file using either of the two ways:
- With Firebase
- Without Firebase
And we will be using firebase for setting google project and get google services configuration file.
1.1 With Firebase
Firebase is a Backend-as-a-Service (BaaS) platform. It is getting popular by the day because of the ease of integration and variety of functionalities available on it.
A lot of quick integrations are available with Firebase. Some of these are listed below:
- Real-time database
- Email Authentication
- Social logins
- In-app messages
- Push notifications
- Analytics
- Crashlytics
- Remote config
Firebase is quickly growing to become the most popular mobile app back-end platform. And we will be using Social Login service here.
Firebase is our back-end, so we need to configure few things in Firebase. First of all we’ll create a new Firebase project and new app inside it.
- Create New Firebase Project: if you don’t have any firebase project yet, create new firebase project after creating account on firebase . following is the screenshot for creating project on firebase.
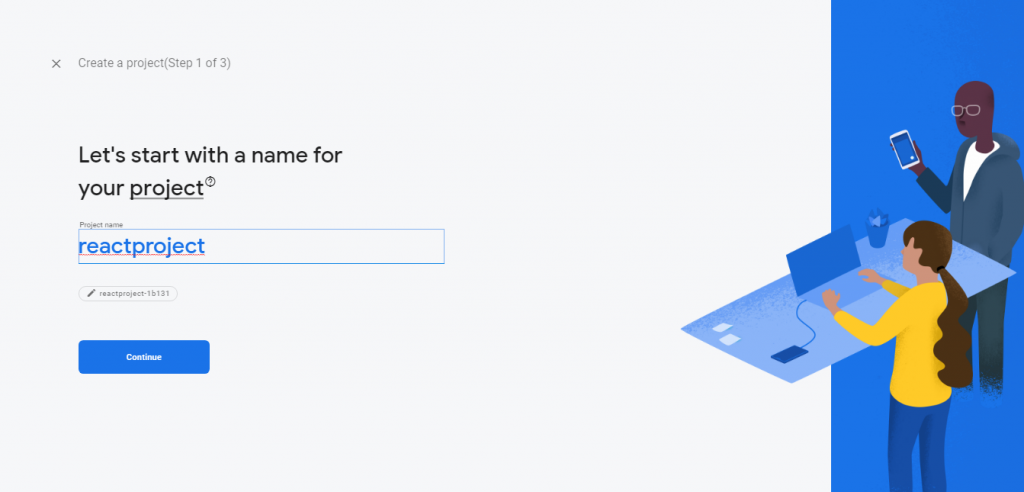
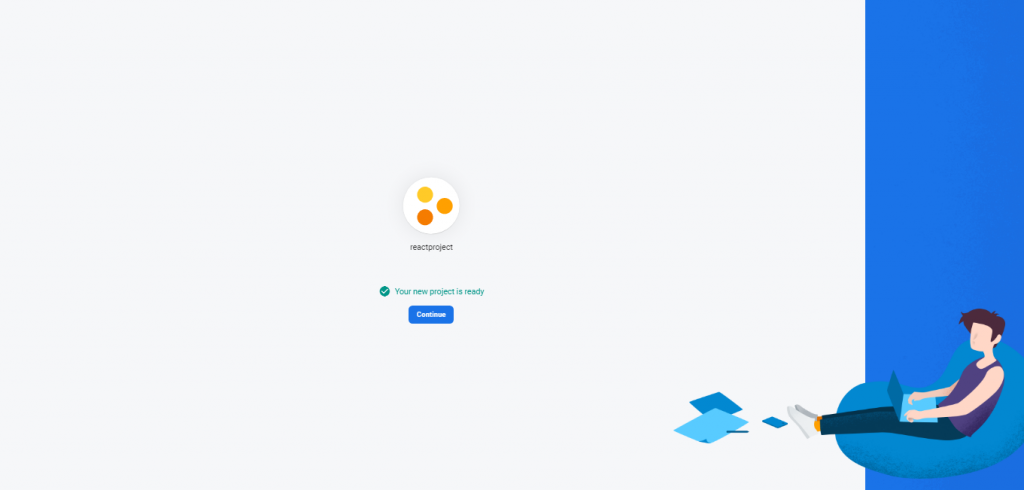
After entering name in the create project, a screen will appear saying “your project is ready” , then click on continue.
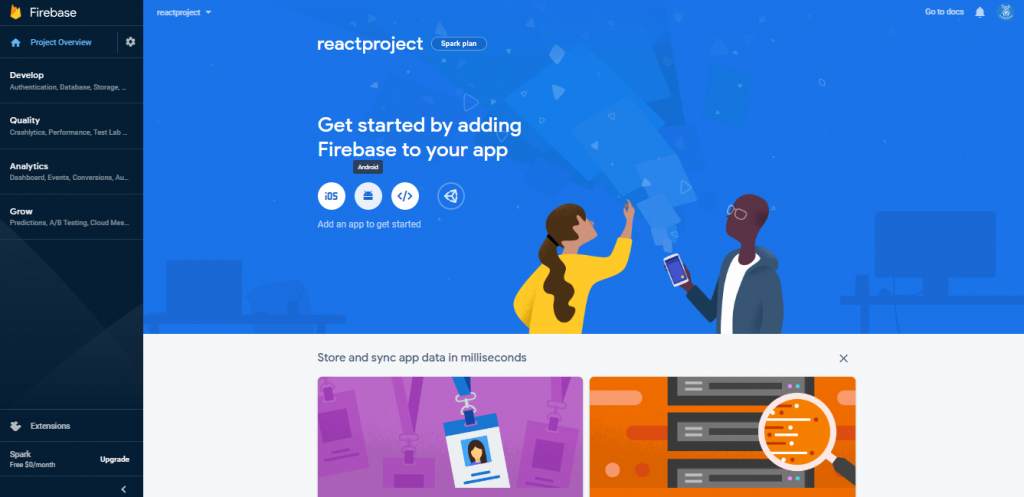
- Add app to the project: After firebase project is created successfully, then you have to add an app to the project. Click on android icon in the following screen to add android app in the project.
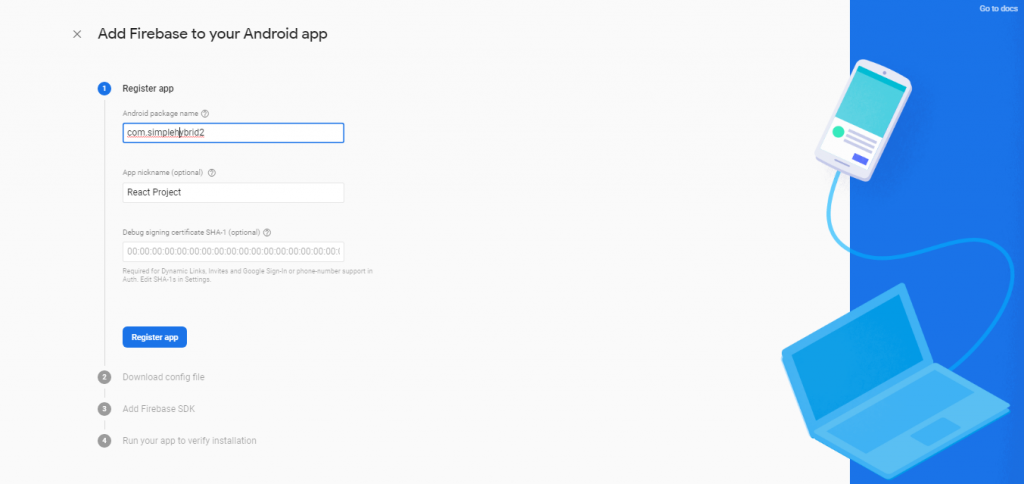
Then in the next screen , enter package of the android app and click on register app and then follow the next steps.
Then click on the project settings icon, and then new window will open, there you have to click on Add Fingerprint button in the app options. There you have to add SHA-1 signature of the Android App.
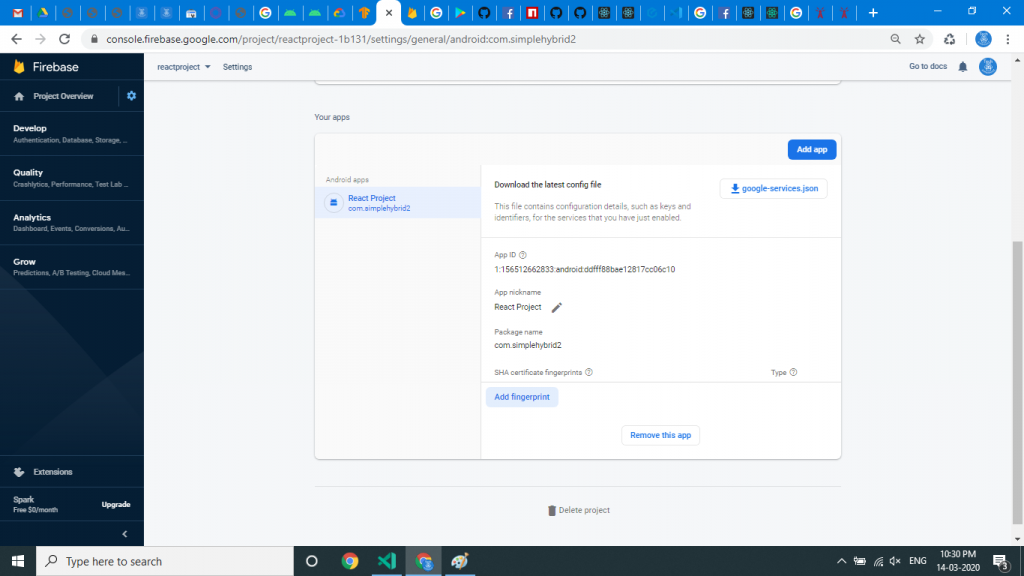
Important Point: Create a SHA-1 Signature
This is a way for the app and Firebase to recognize the system from which the app was developed. It is generated based on the system and your keystore file.
For Debug key:-
Generate the key using following command after moving into the bin directory of java jdk installation. e.g suppose java is installed in C:\Program Files\Java\jdk1.8.0_131 directory, then you need to change directory to C:\Program Files\Java\jdk1.8.0_131/bin and then run the following command in the command prompt:
keytool -list -v -keystore path_to_debug.keystore -alias androiddebugkey -storepass android -keypass android
Important : React Native automatically generates a debug.keystore for your Android project, which resides in Android project folder in. e.g Suppose your project path is F:\reactnativeprojects\simplehybrid2, then you have to use path for path_to_debug.keystore as F:\reactnativeprojects\simplehybrid2\android\app\debug.keystore .
For Release APK Key:-
For release Apk key, you have to use following command:
keytool -list -v -keystore path_to_release_keystore -alias mykey_alias -storepass storepassword -keypass keypassword
Here path_to_release_keystore is the path where you have created and saved your release keystore. Suppose you have created the release keystore in the same directory where your debug.keystore is present and mykey_release is the name of the key , then the path would be F:\reactnativeprojects\simplehybrid2\android\app\mykey_release.keystore . And storepassword and keypassword are the passwords you created while generating release keystore for signing APK. Here i am using my own project path, you can change it with your project path.
For creating release keystore for React native App, follow this link.
Now that, you have the SHA-1 signature of the app, so add this SHA-1 to the Add Fingerprint option in the firebase project app as discussed above. You would have to add two separate fingerprints for both debug mode and release mode. And then download the google-services.json file from there.
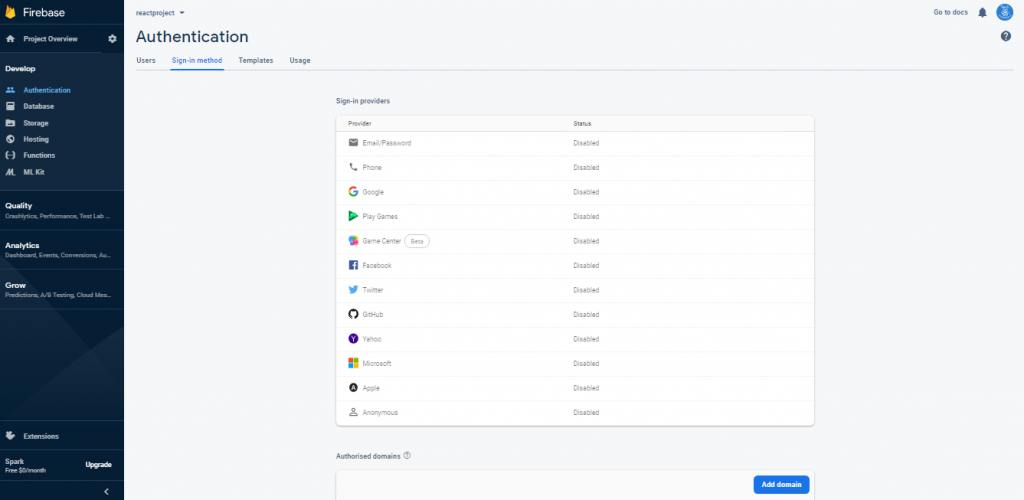
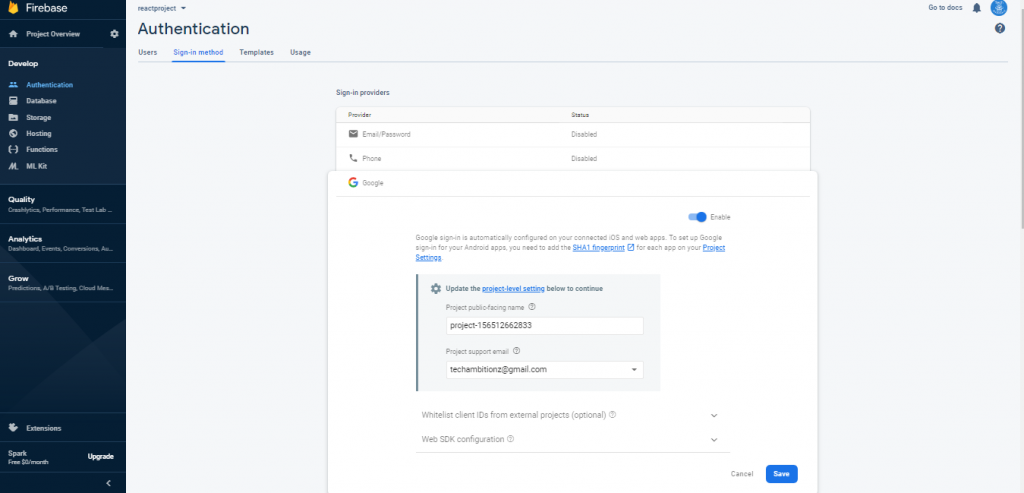
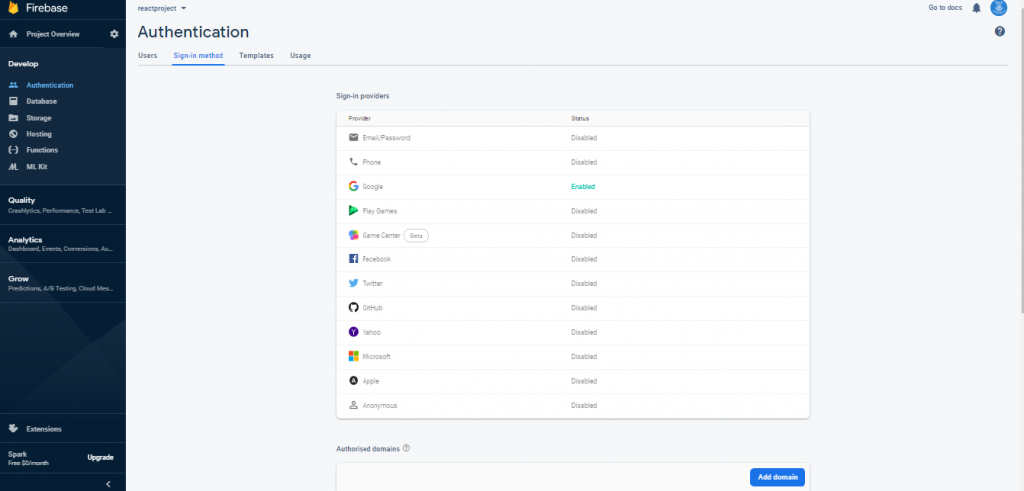
IMPORTANT STEP: Enable Google Login Authentication in Firebase
Remember to Enable Google Login service in Firebase.
1.2 Without Firebase
If you dont want to use firebase, then Follow the instructions to Configure a Google API Project from the official docs. And get configuration file(google-service.json) from there.
Now that you have the configuration file, So Place the generated configuration file (google-services.json) into android/app directory of your project.
2.Installing react-native-google-signin npm package
You have to run the following command in command prompt for installing react-native-google-signin from inside your project directory:
npm install react-native-google-signin
2.1 Link the native module
in RN >= 0.60 you should not need to do anything thanks to autolinking
in RN < 0.60 run you have to use following command for linking
npm install react-native-google-signin
2.2 Update Android configuration files
- Update android/build.gradle file with the following changes. My configuration file is:
buildscript {
    ext {
        buildToolsVersion = "28.0.3"
        minSdkVersion = 16
        compileSdkVersion = 28
        targetSdkVersion = 28
        googlePlayServicesAuthVersion = "17.0.0" //<--- use this version or newer for google signin
    }
    repositories {
        google()
        jcenter()
    }
    dependencies {
        classpath("com.android.tools.build:gradle:3.4.2") // <--- <--- use this version or newer
        classpath("com.google.gms:google-services:4.3.1") // <--- use this version or newer for google signin
    }
}
allprojects {
    repositories {
        mavenLocal()
        maven {
            // All of React Native (JS, Obj-C sources, Android binaries) is installed from npm
            url("$rootDir/../node_modules/react-native/android")
        }
        maven {
            // Android JSC is installed from npm
            url("$rootDir/../node_modules/jsc-android/dist")
        }
        google()
        jcenter()
        maven { url 'https://jitpack.io' }
    }
}
- Update android/app/build.gradle with following changes:
//other code here.....
dependencies {
    implementation fileTree(dir: "libs", include: ["*.jar"])
    implementation "com.android.support:appcompat-v7:23.0.1"
    implementation "com.facebook.react:react-native:+"
    implementation(project(":react-native-google-signin"))
}
apply plugin: 'com.google.gms.google-services' // <--- this should be the last line
2.3 Check that react-native link linked the native module, Remember: check this only if you used manual linking
- In android/settings.gradle you should have following:
...
include ':react-native-google-signin', ':app'
project(':react-native-google-signin').projectDir = new File(rootProject.projectDir, '../node_modules/@react-native-community/google-signin/android')
- In MainApplication.java you should have import co.apptailor.googlesignin.RNGoogleSigninPackage available for manual liking for version < 0.60 only , In newer version >- 0.60, no need to check this step:
import co.apptailor.googlesignin.RNGoogleSigninPackage;  // <--- import
public class MainApplication extends Application implements ReactApplication {
  ......
  @Override
    protected List<ReactPackage> getPackages() {
      return Arrays.<ReactPackage>asList(
          new MainReactPackage(),
          new RNGoogleSigninPackage() // <-- this needs to be in the list
      );
    }
  ......
}
3. Implementing Google Signin functions in the app
Now that the app is all connected to Google Auth, let’s write the actual code to call login , logout functions. Following are the steps to implement Google Signin in your app:
3.1 Import Google Signin Button:
First of all, you need to import GoogleSigninButton ,GoogleSignin ,statusCodes in your App.js:
import { GoogleSignin, GoogleSigninButton, statusCodes } from 'react-native-google-signin';
//....somewhere inside render
<GoogleSigninButton
    style={{ width: 192, height: 48 }}
    size={GoogleSigninButton.Size.Wide}
    color={GoogleSigninButton.Color.Dark}
    onPress={this._signIn}
    disabled={this.state.isSigninInProgress} />
//....
This will display the Google Signin Button in the app.
2.2 Configure Sign In
It is mandatory to call configure(options) method before attempting to call signIn() . configure method is used to setup intialization of Google Signin. In typical scenarios, configure() needs to be called only once, after your app starts .So You can call this method in componentDidMount() .
Following are the all options for the configure method with short descriptions:
GoogleSignin.configure({
  scopes: ['https://www.googleapis.com/auth/drive.readonly'], // what API you want to access on behalf of the user, default is email and profile
  webClientId: '<FROM DEVELOPER CONSOLE>', // client ID of type WEB for your server (needed to verify user ID and offline access)
  offlineAccess: true, // if you want to access Google API on behalf of the user FROM YOUR SERVER
  hostedDomain: '', // specifies a hosted domain restriction
  loginHint: '', // [iOS] The user's ID, or email address, to be prefilled in the authentication UI if possible. [See docs here](https://developers.google.com/identity/sign-in/ios/api/interface_g_i_d_sign_in.html#a0a68c7504c31ab0b728432565f6e33fd)
  forceConsentPrompt: true, // [Android] if you want to show the authorization prompt at each login.
  accountName: '', // [Android] specifies an account name on the device that should be used
  iosClientId: '<FROM DEVELOPER CONSOLE>', // [iOS] optional, if you want to specify the client ID of type iOS (otherwise, it is taken from GoogleService-Info.plist)
});
3.2 Sign In method
Prompts a modal to let the user sign in into your application.Resolved promise returns an userInfo object.
// ......Somewhere in your code
_signIn = async () => {
    try {
      const check = await GoogleSignin.hasPlayServices();
      if(check){
        console.log("success");
        const userInfo = await GoogleSignin.signIn();
        this.setState({ userInfo: userInfo, loggedIn: true });
      }

    } catch (error) {
      if (error.code === statusCodes.SIGN_IN_CANCELLED) {
        console.log("error="+error.message);
        // user cancelled the login flow
      } else if (error.code === statusCodes.IN_PROGRESS) {
        console.log("error="+error.message);
        // operation (f.e. sign in) is in progress already
      } else if (error.code === statusCodes.PLAY_SERVICES_NOT_AVAILABLE) {
        console.log("error="+error.message);
        // play services not available or outdated
      } else {
        console.log("error="+error.message);
        // some other error happened
      }
    }
  };
The userInfo is saved in the state and hence can use this info for fetching logged in user details. Here i have also used the loggedIn variable in the state for checking whether user has been logged in or not for using in the render method.
Example userInfo object which is returned after successful sign in.
{
  idToken: string,
  serverAuthCode: string,
  scopes: Array<string>, // on iOS this is empty array if no additional scopes are defined
  user: {
    email: string,
    id: string,
    givenName: string,
    familyName: string,
    photo: string, // url
    name: string // full name
  }
}
3.3 Sign Out Method
This method is used for logging user out from your app. It Remove user session from the device.
signOut = async () => {
    try {
      await GoogleSignin.revokeAccess();
      await GoogleSignin.signOut();
      this.setState({ userInfo: null, loggedIn: false }); // Remember to remove the user from your app's state as well
    } catch (error) {
      console.error(error);
    }
  };
Here i have set the userInfo to null and updated loggedIn to false.
3.4 Sign In Silently
When user logs in once, on next app start you don’t want user to login again. So you can try to silently login the user. If user is already logged in and has a valid session, the user will login silenlty successfully. You can call this method as well in componentDidMount(). If the user does not have a valid session, this method will return null and you can ask user to sign in
getCurrentUserInfo = async () => {
    try {
      const userInfo = await GoogleSignin.signInSilently();
      this.setState({ userInfo:userInfo,loggedIn:true });
    } catch (error) {
      if (error.code === statusCodes.SIGN_IN_REQUIRED) {
        // user has not signed in yet
        this.setState({ loggedIn: false });
      } else {
        // some other error
        this.setState({ loggedIn: false });
      }
    }
  };
3.5 Other Methods
There are many other methods available on its official github respository. You can check them here .
So now all the steps have completed. My final App.js looks like this :
App.js
import React, { Component,PureComponent } from 'react';
import {Text,View,TouchableHighlight,StyleSheet,Image,Button} from 'react-native';
import logo from './logo.png';
import { GoogleSignin, GoogleSigninButton,statusCodes } from 'react-native-google-signin';
import { ScrollView } from 'react-native-gesture-handler';

const WEB_CLIENT_ID = '734869707217-obl26vricn8jfoo729q1kglha7gcmbpm.apps.googleusercontent.com';

export default class App extends PureComponent{

  constructor(props){
    super(props);
    this.state = {
      userInfo: null,
      loggedIn: false
    }
  }

  componentDidMount(){
    GoogleSignin.configure({
      webClientId: WEB_CLIENT_ID,
      offlineAccess: true,
      hostedDomain: '',
    });
    //GoogleSignin.configure();
  }

  _signIn = async () => {
    try {
      const check = await GoogleSignin.hasPlayServices();
      if(check){
        console.log("success");
        const userInfo = await GoogleSignin.signIn();
        this.setState({ userInfo: userInfo, loggedIn: true });
      }

    } catch (error) {
      if (error.code === statusCodes.SIGN_IN_CANCELLED) {
        console.log("error="+error.message);
        // user cancelled the login flow
      } else if (error.code === statusCodes.IN_PROGRESS) {
        console.log("error="+error.message);
        // operation (f.e. sign in) is in progress already
      } else if (error.code === statusCodes.PLAY_SERVICES_NOT_AVAILABLE) {
        console.log("error="+error.message);
        // play services not available or outdated
      } else {
        console.log("error="+error.message);
        // some other error happened
      }
    }
  };

  getCurrentUserInfo = async () => {
    try {
      const userInfo = await GoogleSignin.signInSilently();
      this.setState({ userInfo:userInfo,loggedIn:true });
    } catch (error) {
      if (error.code === statusCodes.SIGN_IN_REQUIRED) {
        // user has not signed in yet
        this.setState({ loggedIn: false });
      } else {
        // some other error
        this.setState({ loggedIn: false });
      }
    }
  };

  signOut = async () => {
    try {
      await GoogleSignin.revokeAccess();
      await GoogleSignin.signOut();
      this.setState({ userInfo: null, loggedIn: false }); // Remember to remove the user from your app's state as well
    } catch (error) {
      console.error(error);
    }
  };

  render() {
    return (
      <View style={{ flex: 1, justifyContent: 'center'}}>

        <View style={{justifyContent:"center"}}>
        <ScrollView style={{paddingHorizontal:16}}>
          <View style={{paddingVertical:16}}>
          <View style={styles.container}>
          <Image source={logo} style={[styles.logo]}/>
          </View>
          <Text style={{alignSelf:"center"}}>React native Google Sign In Example!</Text>
          <View style={styles.buttonContainer}>
            {!this.state.loggedIn &&
            <View>
              <GoogleSigninButton
              style={{ width: 252, height: 48 }}
              size={GoogleSigninButton.Size.Wide}
              color={GoogleSigninButton.Color.Light}
              onPress={this._signIn}
              disabled={this.state.isSigninInProgress}
              />
              <Text style={{alignSelf:"center"}}>You are currently logged out</Text>
              </View>
            }
          </View>
          {this.state.loggedIn && <View>
              <View>
                <Text style={{fontSize: 25,alignSelf:'center'}}>User Info</Text>
              </View>
              <View style={styles.dp}>
                <Image
                  style={{ width: 100, height: 100 }}
                  source={{ uri: this.state.userInfo && this.state.userInfo.user && this.state.userInfo.user.photo }}
                />
              </View>
              <View style={styles.detailContainer}>
                <Text style={styles.title}>Name</Text>
                <Text style={styles.message}>{this.state.userInfo && this.state.userInfo.user && this.state.userInfo.user.name}</Text>
              </View>
              <View style={styles.detailContainer}>
                <Text style={styles.title}>Email</Text>
                <Text style={styles.message}>{this.state.userInfo && this.state.userInfo.user && this.state.userInfo.user.email}</Text>
              </View>
              <View style={styles.detailContainer}>
                <Text style={styles.title}>ID</Text>
                <Text style={styles.message}>{this.state.userInfo && this.state.userInfo.user && this.state.userInfo.user.id}</Text>
              </View>
              <TouchableHighlight
                onPress={this.signOut}
                style={styles.button}
                underlayColor={'#0A84D0'}
              >
                <Text style={styles.buttonText}>Sign Out</Text>
              </TouchableHighlight>

            </View>}

          <TouchableHighlight

          onPress={()=>{
            this.props.navigation.navigate('AnotherScreen');}
          }
          style={[styles.button,{display:"none"}]}
          underlayColor={'#0A84D0'}
        >
          <Text style={styles.buttonText}>Another Activity</Text>
        </TouchableHighlight>
        </View>
        </ScrollView>
      </View>
    </View>
    );
  }
}

const styles = StyleSheet.create({
  buttonContainer: {
    marginTop: 12,
    paddingHorizontal: 16,
    flexDirection: 'row',
    justifyContent: 'center'
  },
  logo: {
    alignSelf:'center',
    width: 150,
    height: 150,
  },
  buttonContainer: {
    marginTop: 24,
    paddingHorizontal: 16,
    flexDirection: 'row',
    justifyContent: 'center'
  },
  buttonText: {
    color: '#fff',
    fontWeight: 'bold',
    fontSize: 16,
    alignSelf:"center",
  },
  button: {
    borderRadius: 3,
    paddingHorizontal: 20,
    paddingVertical: 16,
    marginVertical: 5,
    marginTop: 16,
    backgroundColor: '#694fad',
    borderRadius:10,
    borderWidth: 1,
    borderColor: '#fff'
  },
  detailContainer: {
    paddingHorizontal: 0
  },
  title: {
    fontSize: 18,
    fontWeight: 'bold',
    paddingTop: 10
  },
  message: {
    fontSize: 14,
    paddingBottom: 15,
    borderBottomColor: "#ccc",
    borderBottomWidth: 1
  },
  dp:{
    marginTop: 24,
    paddingHorizontal: 16,
    flexDirection: 'row',
    justifyContent: 'center'
  },

  body: {
    backgroundColor: "#ffffff",
  },
  sectionContainer: {
    marginTop: 32,
    paddingHorizontal: 16,
    flexDirection: 'row',
    justifyContent: 'center'
  },

  sectionTitle: {
    fontSize: 24,
    fontWeight: '600',
    color: "#000000",
  },
  sectionDescription: {
    marginTop: 8,
    fontSize: 18,
    fontWeight: '400',
    color: "#000000",
  },
  highlight: {
    fontWeight: '700',
  }
});
Important Point: Also one more important point is to copy your WEB_CLIENT_ID from firebase App Project for setting options in the configure(options) method and set it in the configure method’s webClientId option.
Final screenshot of the App:
So we are done with the Implementing Google Signin In React native App For Android.
Enjoy Coding.