

Whenever we create any app for Android or iOS, We need to do a lot of things to the app like adding proper design icons, adding splash screens and adding intro slider etc. After that, our app gets basic template to get ready for reviews.
In this tutorial, i will explain about How To Add Splash screen In React Native App for Android. I have used the react-native-splash-screen package for adding Splash Screen.
Steps to add Splash Screen Using React Native in Android:
1.Install react-native-splash-screen Package
First of all, We need to install react-native-splash-screen package using command prompt in your project directory by following command:-
npm install react-native-splash-screen --save
2. Setup Plugin
After installation is successfull. Then you need to setup plugin.
- React Native 0.59 and lower
If you’re on an older React Native version, you need to manually link the dependencies. To do that, run following command:
react-native link react-native-splash-screen
This linking will do all setup for using plugin.
Alternatively, You can also do setup manually using the following steps:
(i) In your android/settings.gradle file, make the following additions:
include ':react-native-splash-screen'
project(':react-native-splash-screen').projectDir = new File(rootProject.projectDir, '../node_modules/react-native-splash-screen/android')
(ii) In your android/app/build.gradle file, add the :react-native-splash-screen project as a compile-time dependency in dependencies:
...
dependencies {
    ...
    compile project(':react-native-splash-screen')
}
(iii) Update the MainApplication.java file to use react-native-splash-screen via the following changes:
// react-native-splash-screen >= 0.3.1
import org.devio.rn.splashscreen.SplashScreenReactPackage;
// react-native-splash-screen < 0.3.1
import com.cboy.rn.splashscreen.SplashScreenReactPackage;

public class MainApplication extends Application implements ReactApplication {

    private final ReactNativeHost mReactNativeHost = new ReactNativeHost(this) {
        @Override
        public boolean getUseDeveloperSupport() {
            return BuildConfig.DEBUG;
        }

        @Override
        protected List<ReactPackage> getPackages() {
            return Arrays.<ReactPackage>asList(
                    new MainReactPackage(),
            new SplashScreenReactPackage()  //here
            );
        }
    };

    @Override
    public ReactNativeHost getReactNativeHost() {
        return mReactNativeHost;
    }
}
- React Native 0.60 and lower
For React Native 0.60 and higher version , we do not need to do linking manually. Because it does linking automatically.
3. Configuring Plugin
Then you need to configure following changes to start using react-native-splash-screen in your projects.
(i) You need to import react-native-splash-screen package in your MainActivity.java file for using it. And after importing it, You need to call SplashScreen.show() method in onCreate() Method of MainActivity.java as given below:
import com.facebook.react.ReactActivity;
import android.os.Bundle; // here
import org.devio.rn.splashscreen.SplashScreen; // here if you are using react-native-splash-screen >= 0.3.1
import com.cboy.rn.splashscreen.SplashScreen; // here if you are using react-native-splash-screen < 0.3.1

public class MainActivity extends ReactActivity {

    @Override
    protected void onCreate(Bundle savedInstanceState) {
        SplashScreen.show(this);  // here
        super.onCreate(savedInstanceState);
    }

    /**
     * Returns the name of the main component registered from JavaScript.
     * This is used to schedule rendering of the component.
     */
  @Override
  protected String getMainComponentName() {
    return "simlehybrid2";
  }
}
Here , i have used the SplashScreen.show(this). Second parameter can also be used whether we want to show Full Screen splash or not. If true , it will display full screen Splash Activity. Its default value is false.
(ii) Then you need to make changes in your App.js file. There you need to hide Splash Screen immediately when App loads. You can do this in either constructor() or componentDidMount() method. And don’t forget to import SplashScreen from ‘react-native-splash-screen’ package. So make following changes to your App.js:
import SplashScreen from 'react-native-splash-screen';

export default class App extends Component {

    componentDidMount() {
        // do stuff while splash screen is shown
        // After having done stuff hide the splash screen
        SplashScreen.hide();
    }

    .....other code
}
(iii) Then create a file named launch_screen.xml in app/src/main/res/layout directory. This is the layout file used by Splash Screen. The contents of the file should be the following:
<?xml version="1.0" encoding="utf-8"?>
<LinearLayout xmlns:android="http://schemas.android.com/apk/res/android"
    android:orientation="vertical"
    android:layout_width="match_parent"
    android:layout_height="match_parent"
    android:background="@color/white"
    android:gravity="center">
    <ImageView
        android:scaleType="fitXY"
        android:layout_width="200dp"
        android:layout_height="141dp"
        android:src="@mipmap/logo"
    />
</LinearLayout>
You can use any size for the image. and put the any logo image you wish to see in the Splash Screen in the android/app/src/main/res/mipmap directory. I have used the React Native logo here in the example.
(iv) Then Add a color called primary_dark in android/app src/main/res/values/colors.xml file.
<?xml version="1.0" encoding="utf-8"?>
<resources>
    <color name="primary_dark">#000000</color>
</resources>
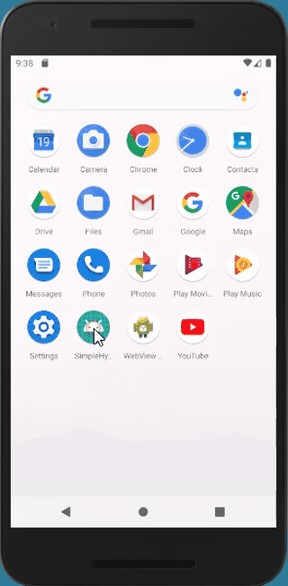
After that ,You are ready to run Splash Screen in your App. If You will run your app now , it will look as given in below screenshot:
Oops!, have you noticed the white flash in the beginning before Splash Screen loads. That’s the problem with this Splash Screen Package.
That’s when Android Preview Screen is being shown.This screen is shown by default in Android Application in React native. We can disable that with using one of the following options by applying some style changes in the AppTheme in android/app/src/main/res/values/styles.xml:
Using android:windowIsTransculent :-
You can set Android Preview activity to transparent by setting android:windowIsTransculent property to true in AppTheme. This will make that activity transparent, so that the white splash would not be visible anymore.
<resources>
    <!-- Base application theme. -->
    <style name="AppTheme" parent="Theme.AppCompat.Light.NoActionBar">
        <!-- Customize your theme here. -->
        <item name="android:textColor">#000000</item>
        <item name="android:windowIsTranslucent">true</item>
    </style>
</resources>
Using android:windowDisablePreview:-
You can also directly disable Preview Activity by setting android:windowDisablePreview property to true in AppTheme style.
<resources>

    <!-- Base application theme. -->
    <style name="AppTheme" parent="Theme.AppCompat.Light.NoActionBar">
        <!-- Customize your theme here. -->
        <item name="android:textColor">#000000</item>
        <item name="android:windowDisablePreview">true</item>
    </style>
</resources>
Once you are done with these changes, Then run your app. Then you will see that white splash has gone away. Its not visible anymore. So that’s how i implemented the Splash Screen in React Native.

I hope this tutorial would help all of you to use Splash Screen properly in React Native.
Thanks!
Happy Coding!


2 Comments
Awesome post! Keep up the great work! 🙂
Great content! Super high-quality! Keep it up! 🙂